5 min read
How to use Fit
Fit suggests a layout from your measurements. Move the racks to try other layouts, then check them in 3D.
1.Start with the floor plan
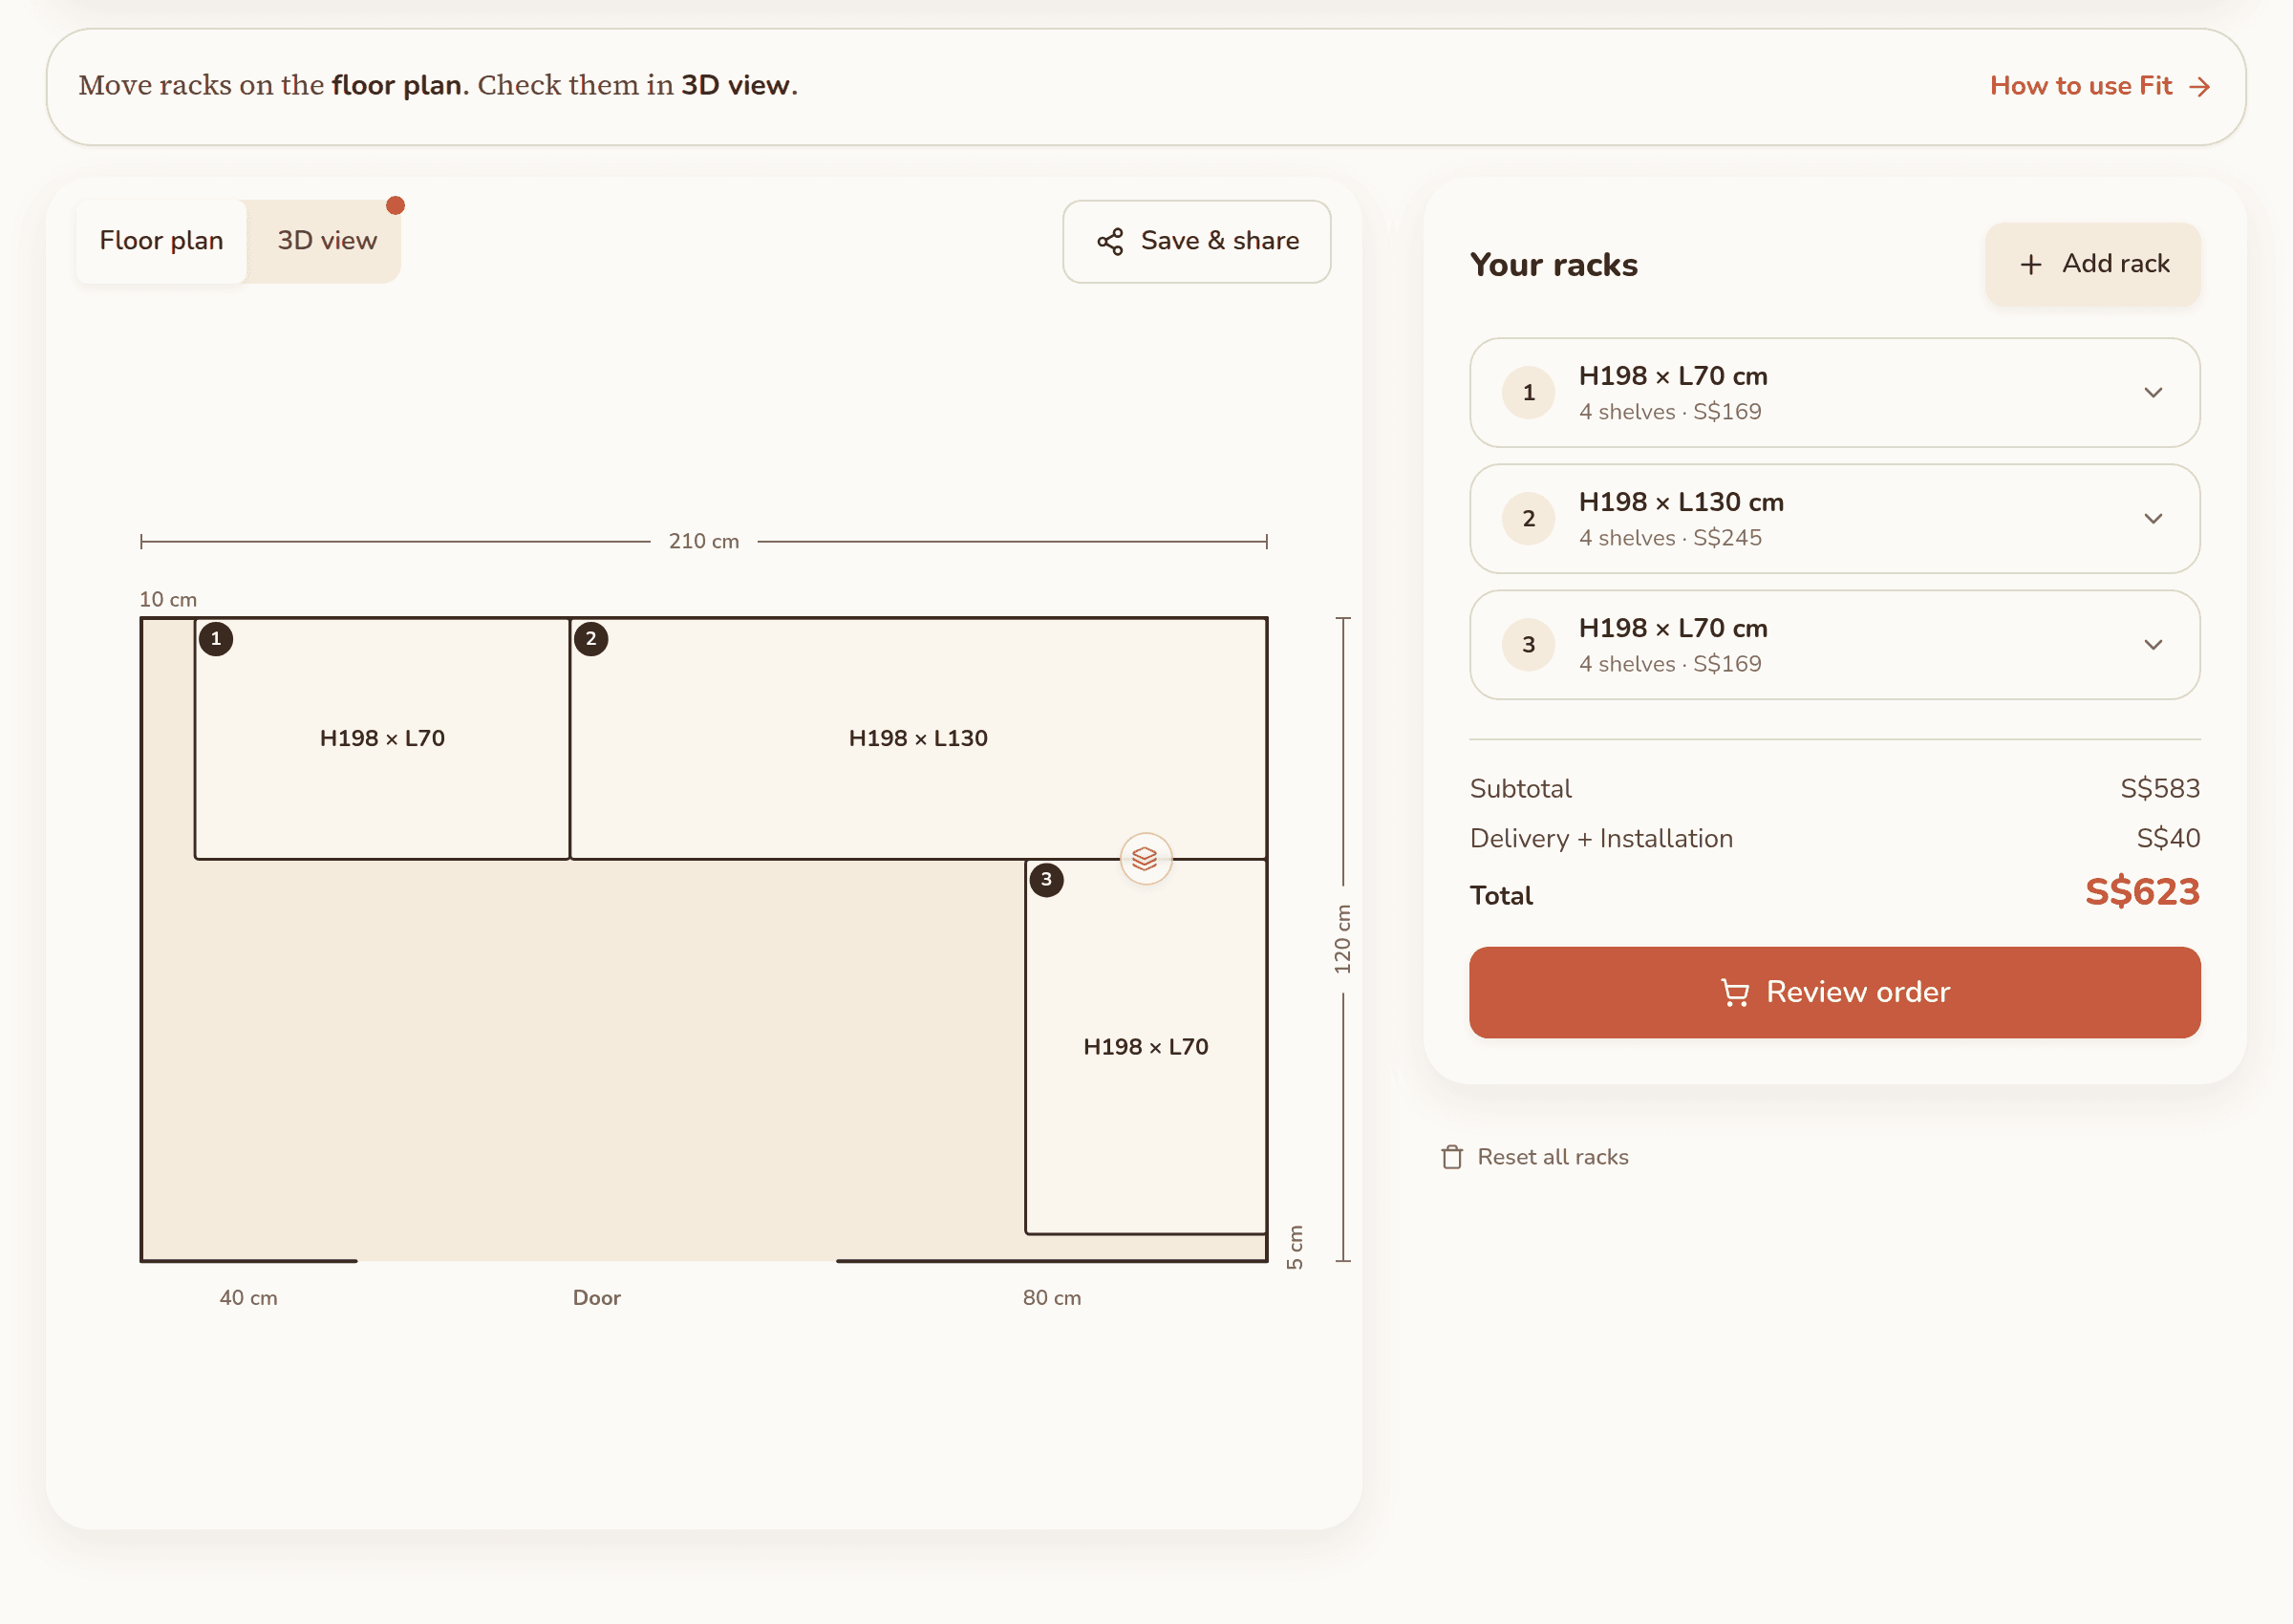
The floor plan is the top-down view of your storeroom. The opening is the door, the numbered blocks are racks, and the rack numbers match the list on the right.
Add a rack, then drag it into place. Rotate it to turn the long side to another wall.
2.Read the numbers
The top and side labels show your room width and depth. The door-side labels show the left and right wall pieces beside the door.
Smaller gap numbers appear around racks when there is leftover space along a wall. If a gap looks too tight, try a shorter rack, rotate the rack, or move it to the other wall. Each rack shows its height and length in cm, for example H198 × L130. All our racks are 45cm deep.
3.Try out different rack sizes
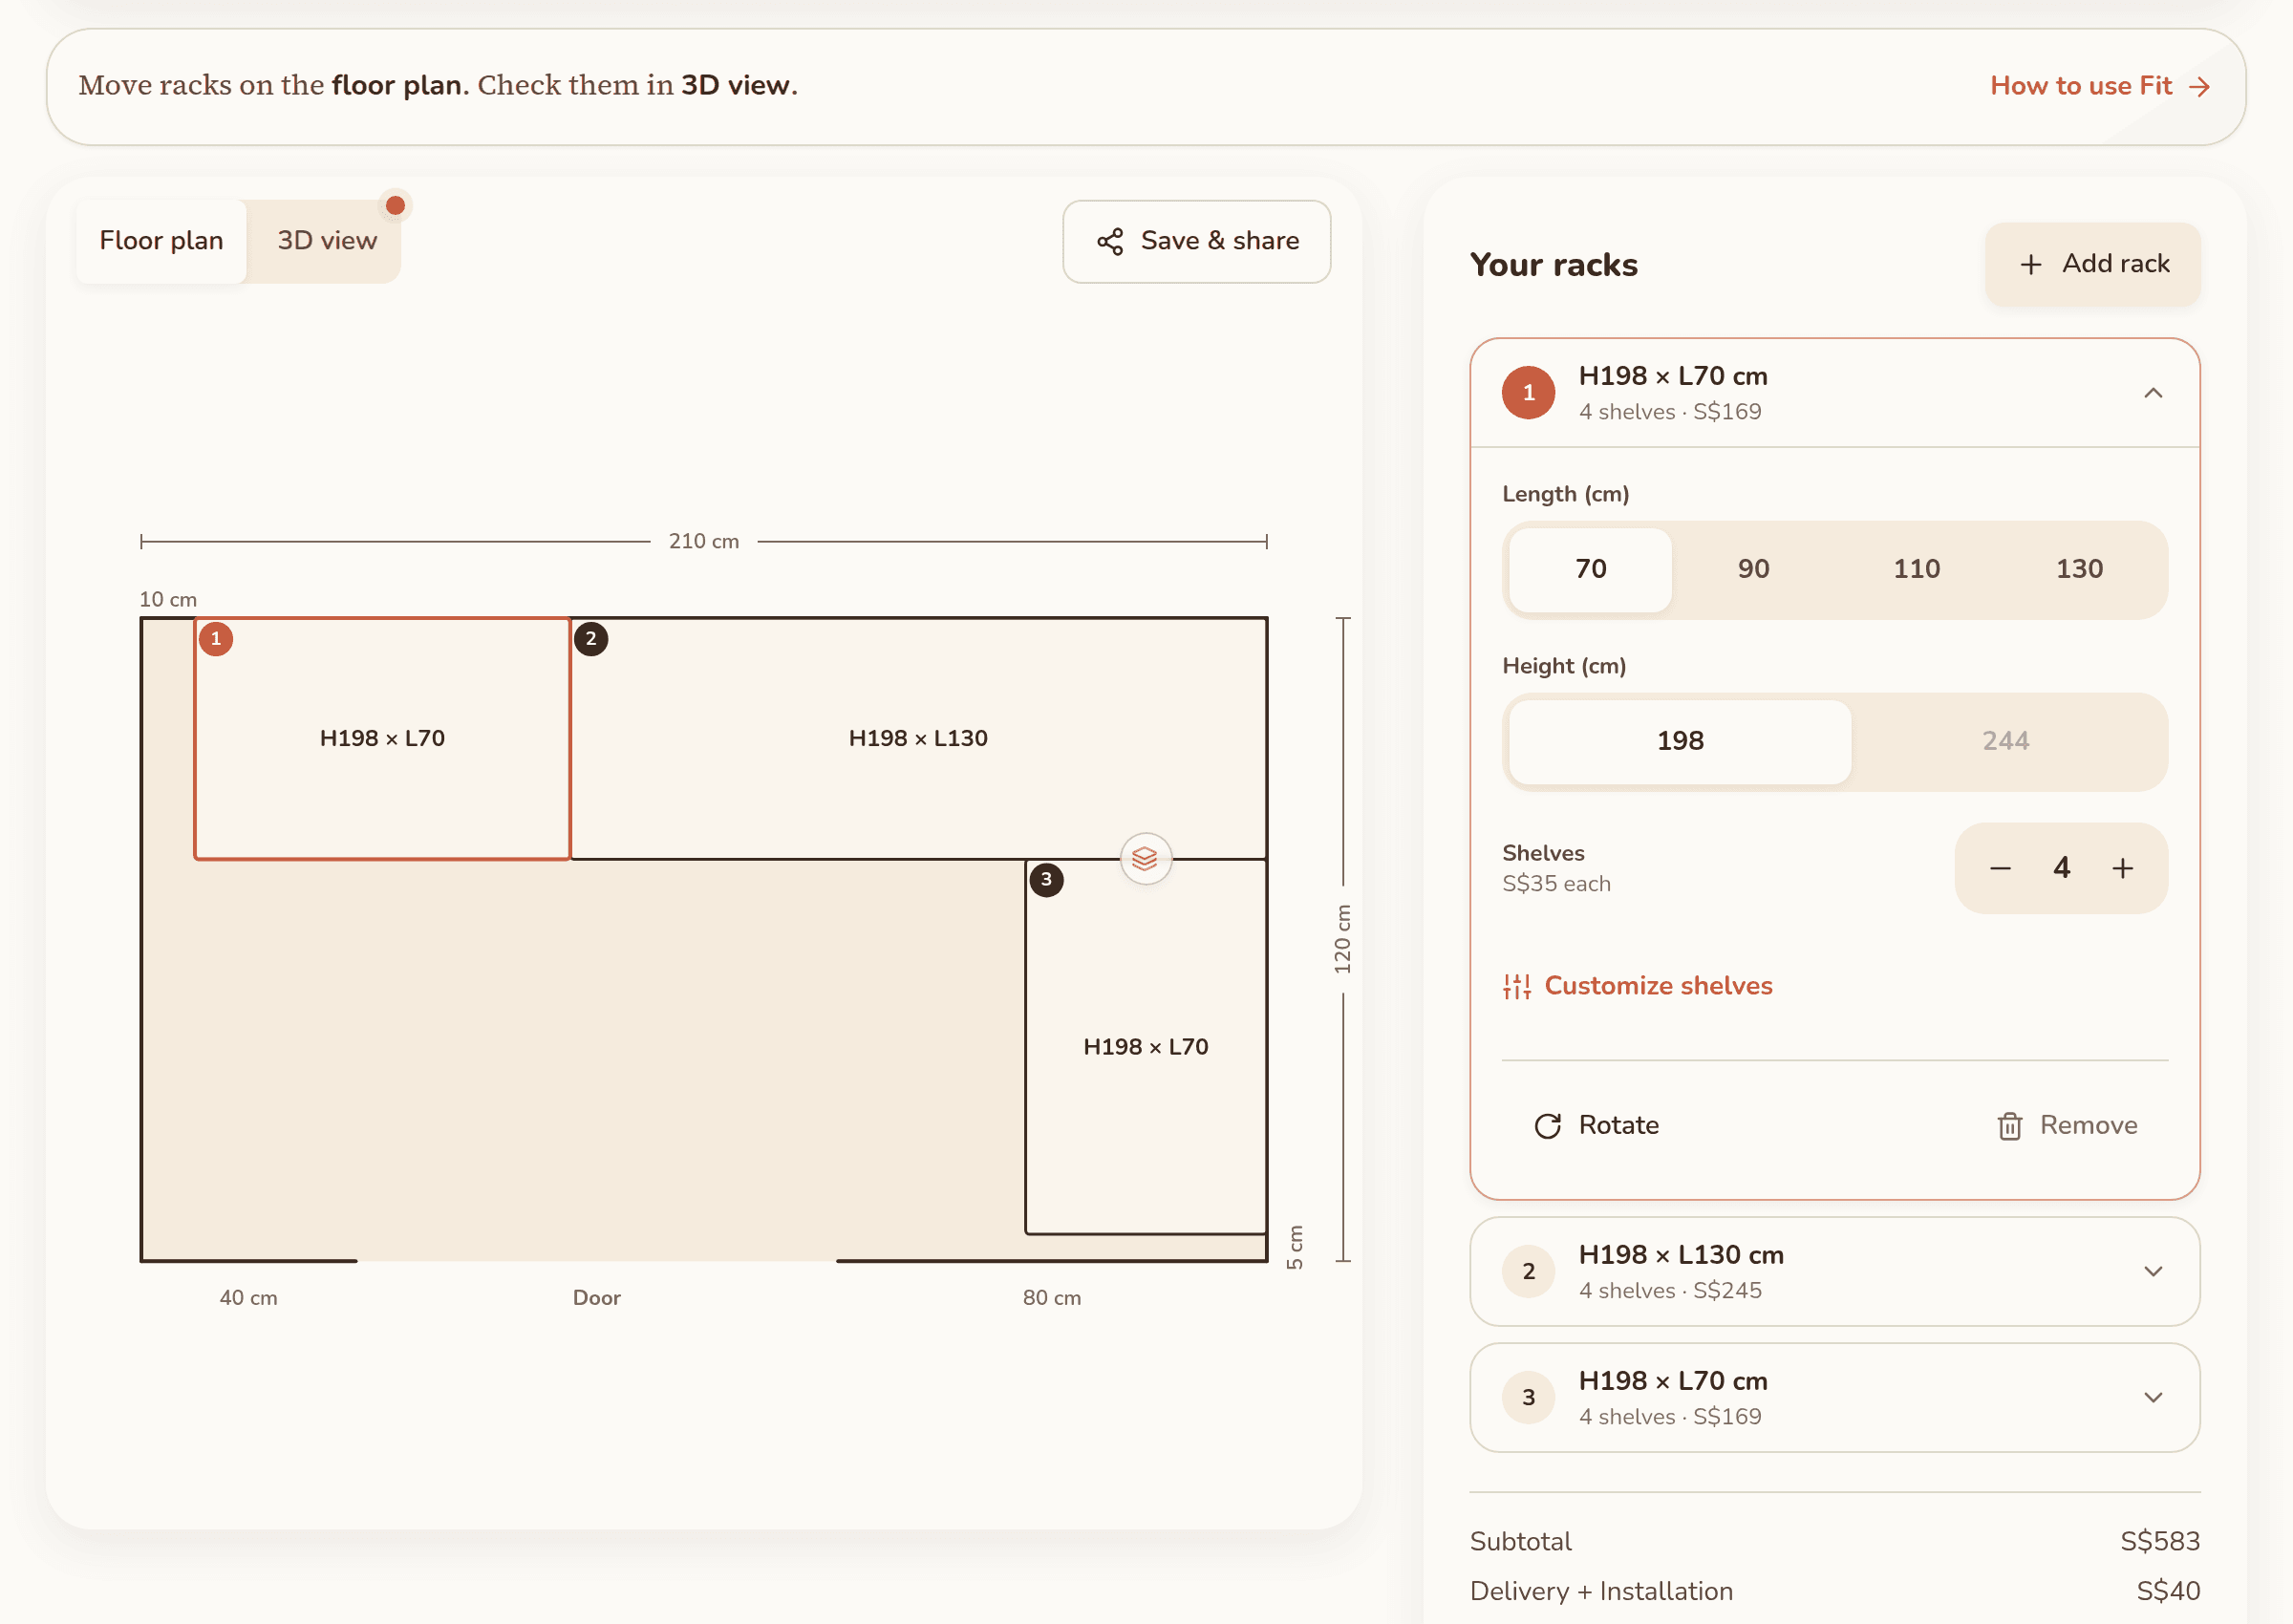
Select a rack in Your racks to open it. Change its length, height and number of shelves there.
The price changes as you add racks or shelves, so it always matches what’s on screen.
4.Check the same layout in 3D
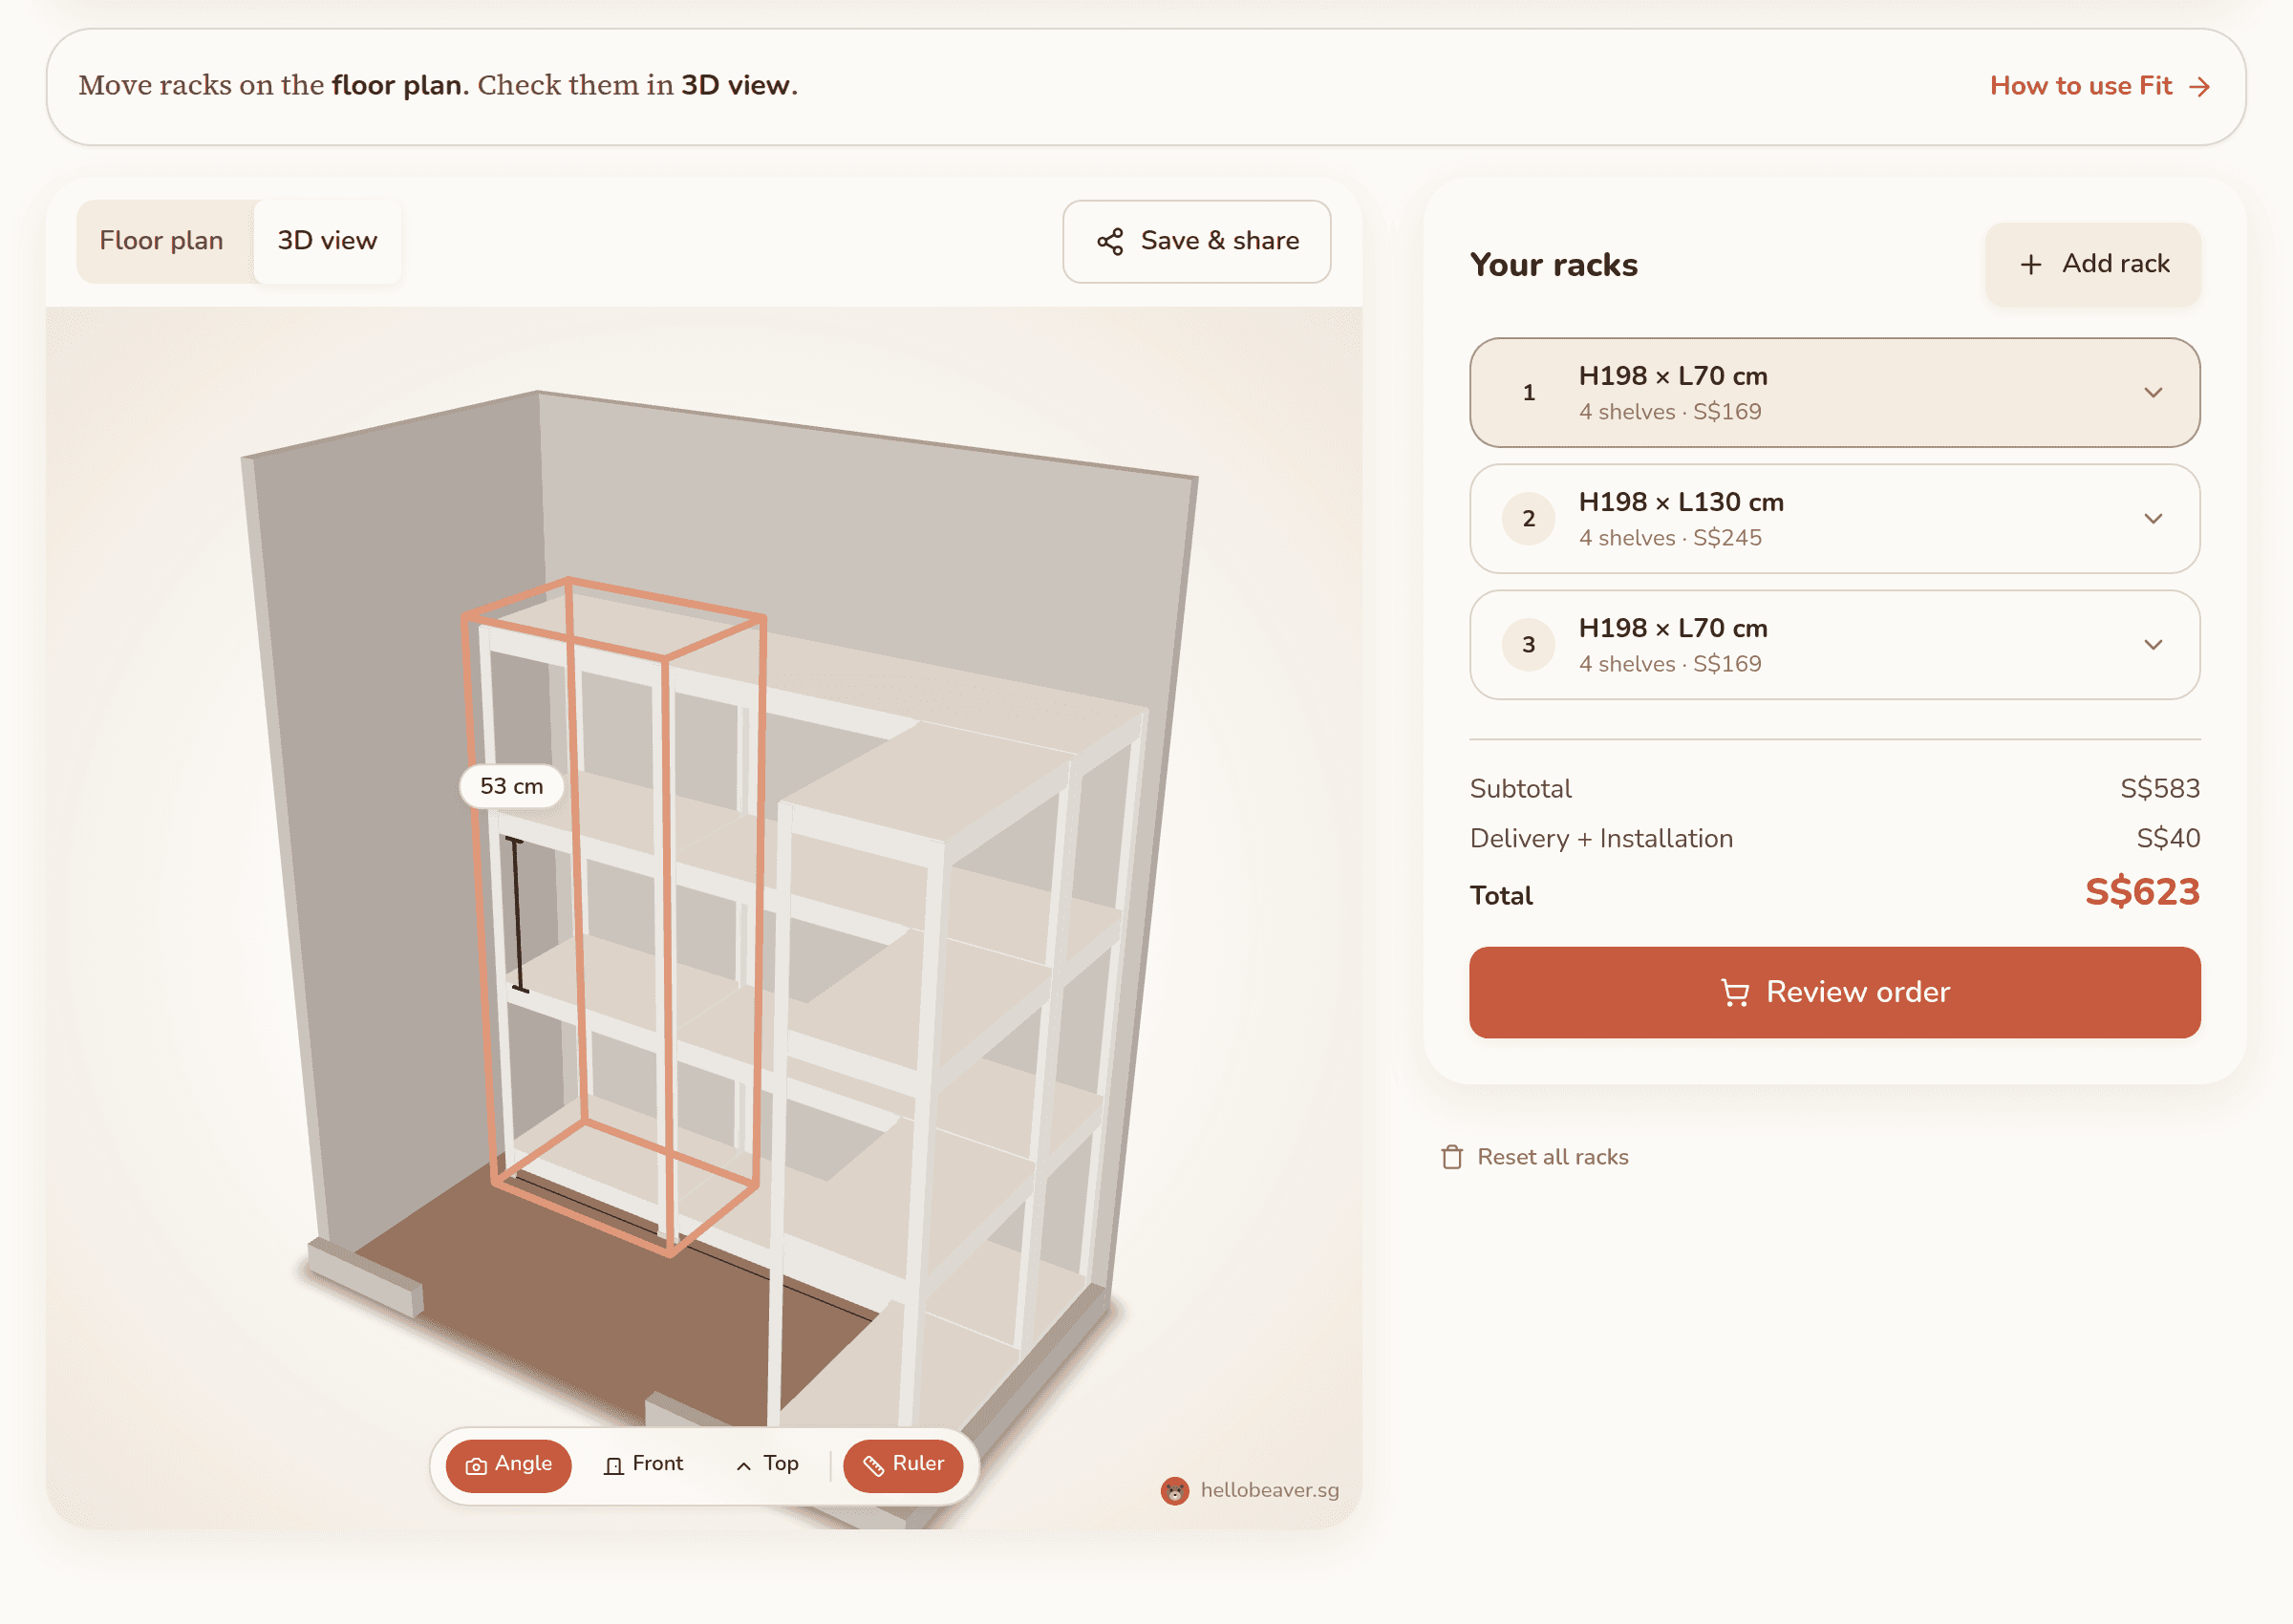
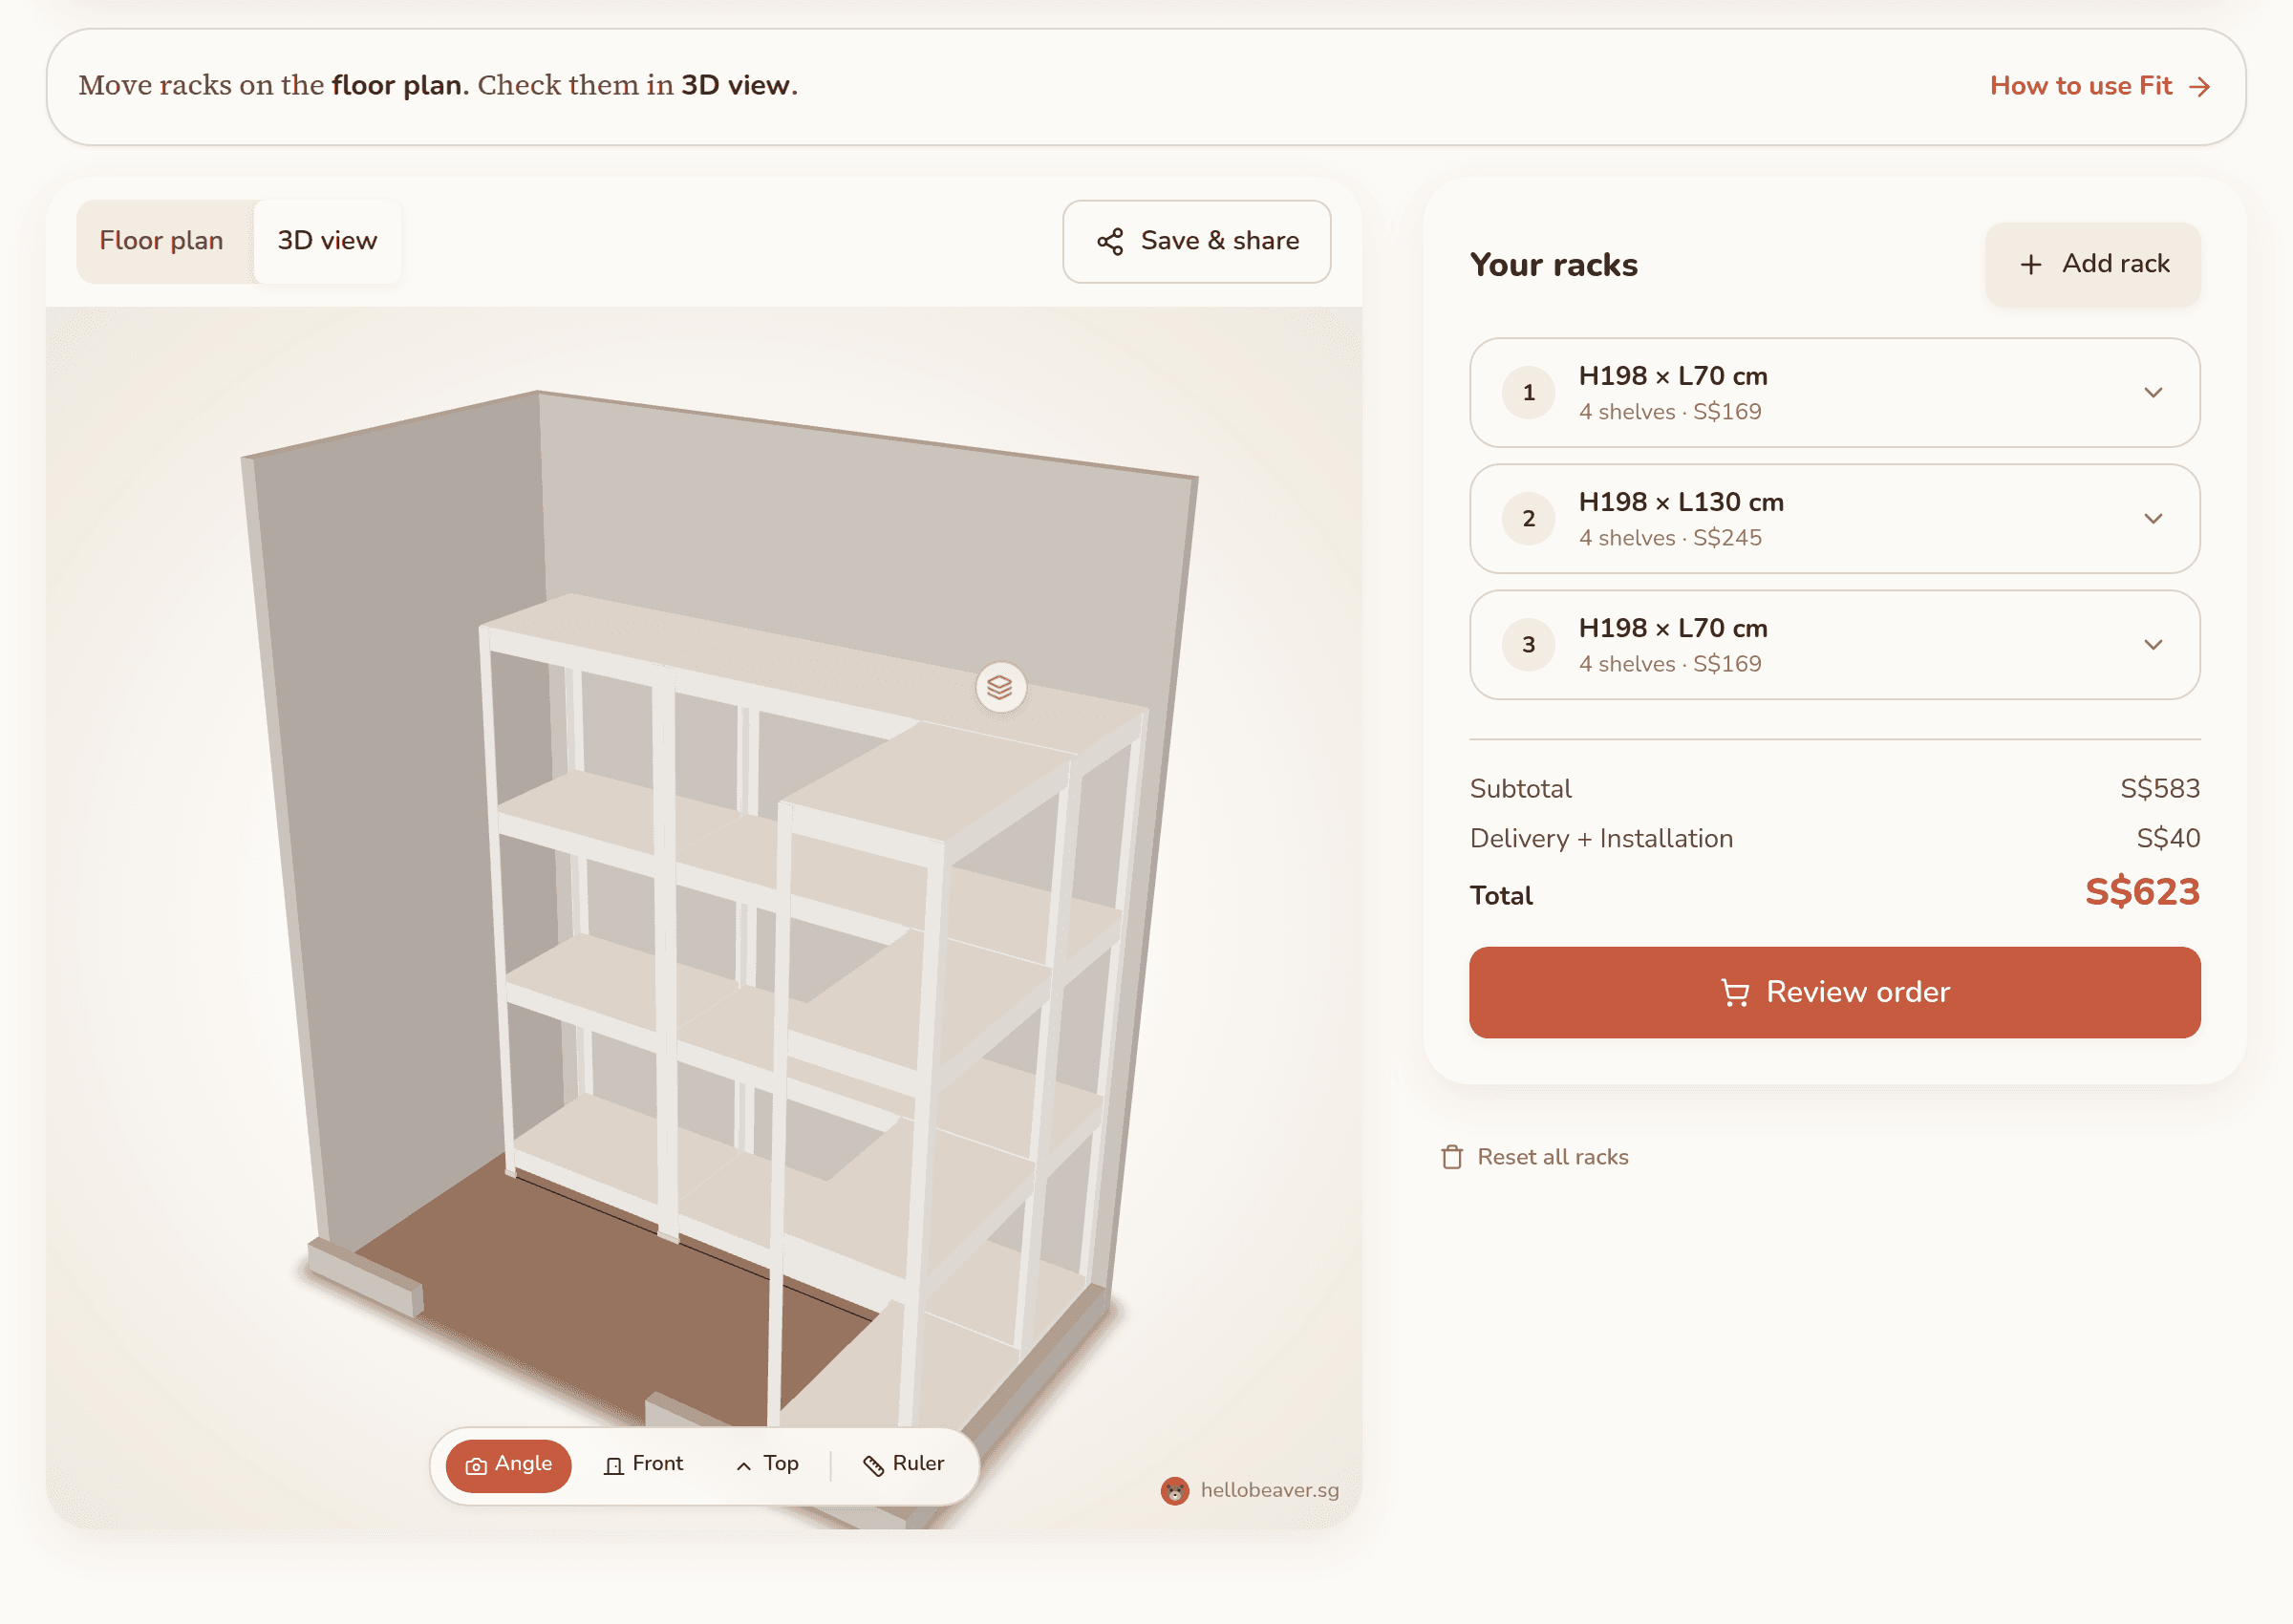
The 3D view shows the same rack layout inside the room. Use it to check height, shelf openings, walking space, and whether the room feels too packed.
Use Angle for the overall feel, Front for shelf height, and Top when you want to compare the 3D view back to the floor plan. To move racks, go back to the floor plan. The 3D view is only for checking.
5.Compare shelf options in 3D
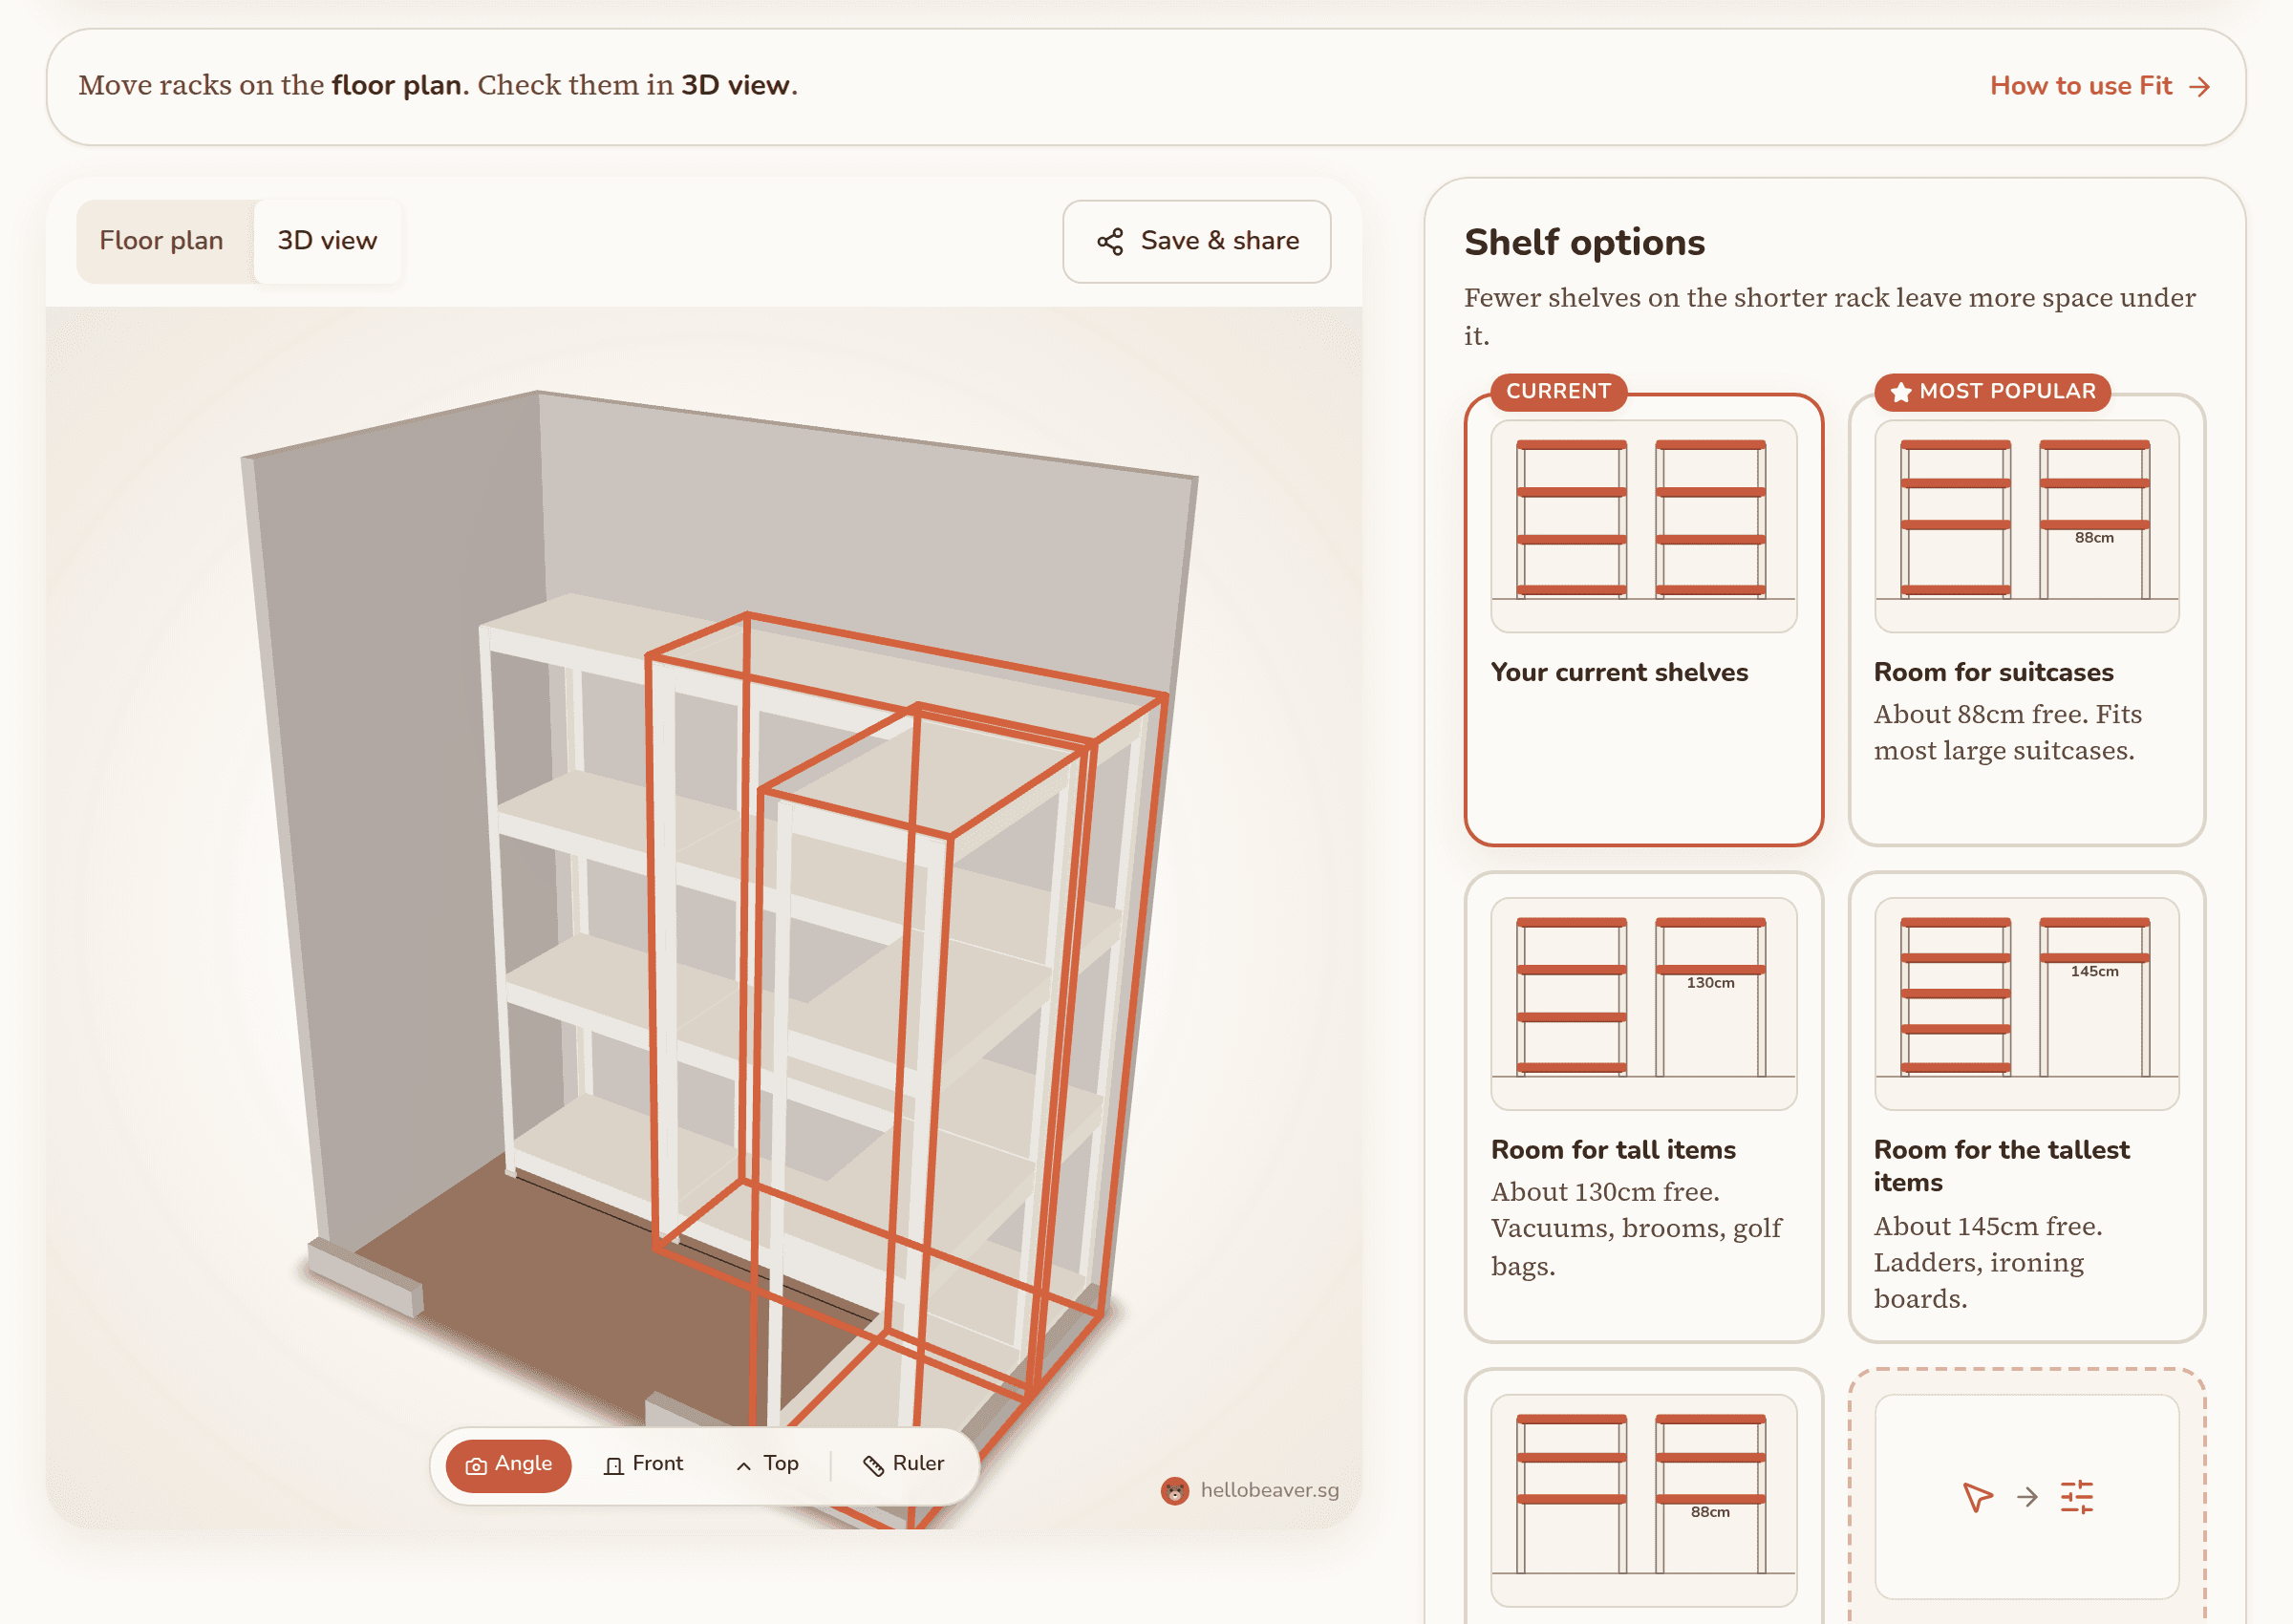
Select Shelf options where two racks meet to compare ready-made shelf layouts. Fit zooms in on the two racks so you can compare options up close.
Choose an option to preview it on the racks straight away. Use Set your own shelves when you want to adjust one rack yourself, then select Done when you are happy.
6.Adjust the shelves for what you store
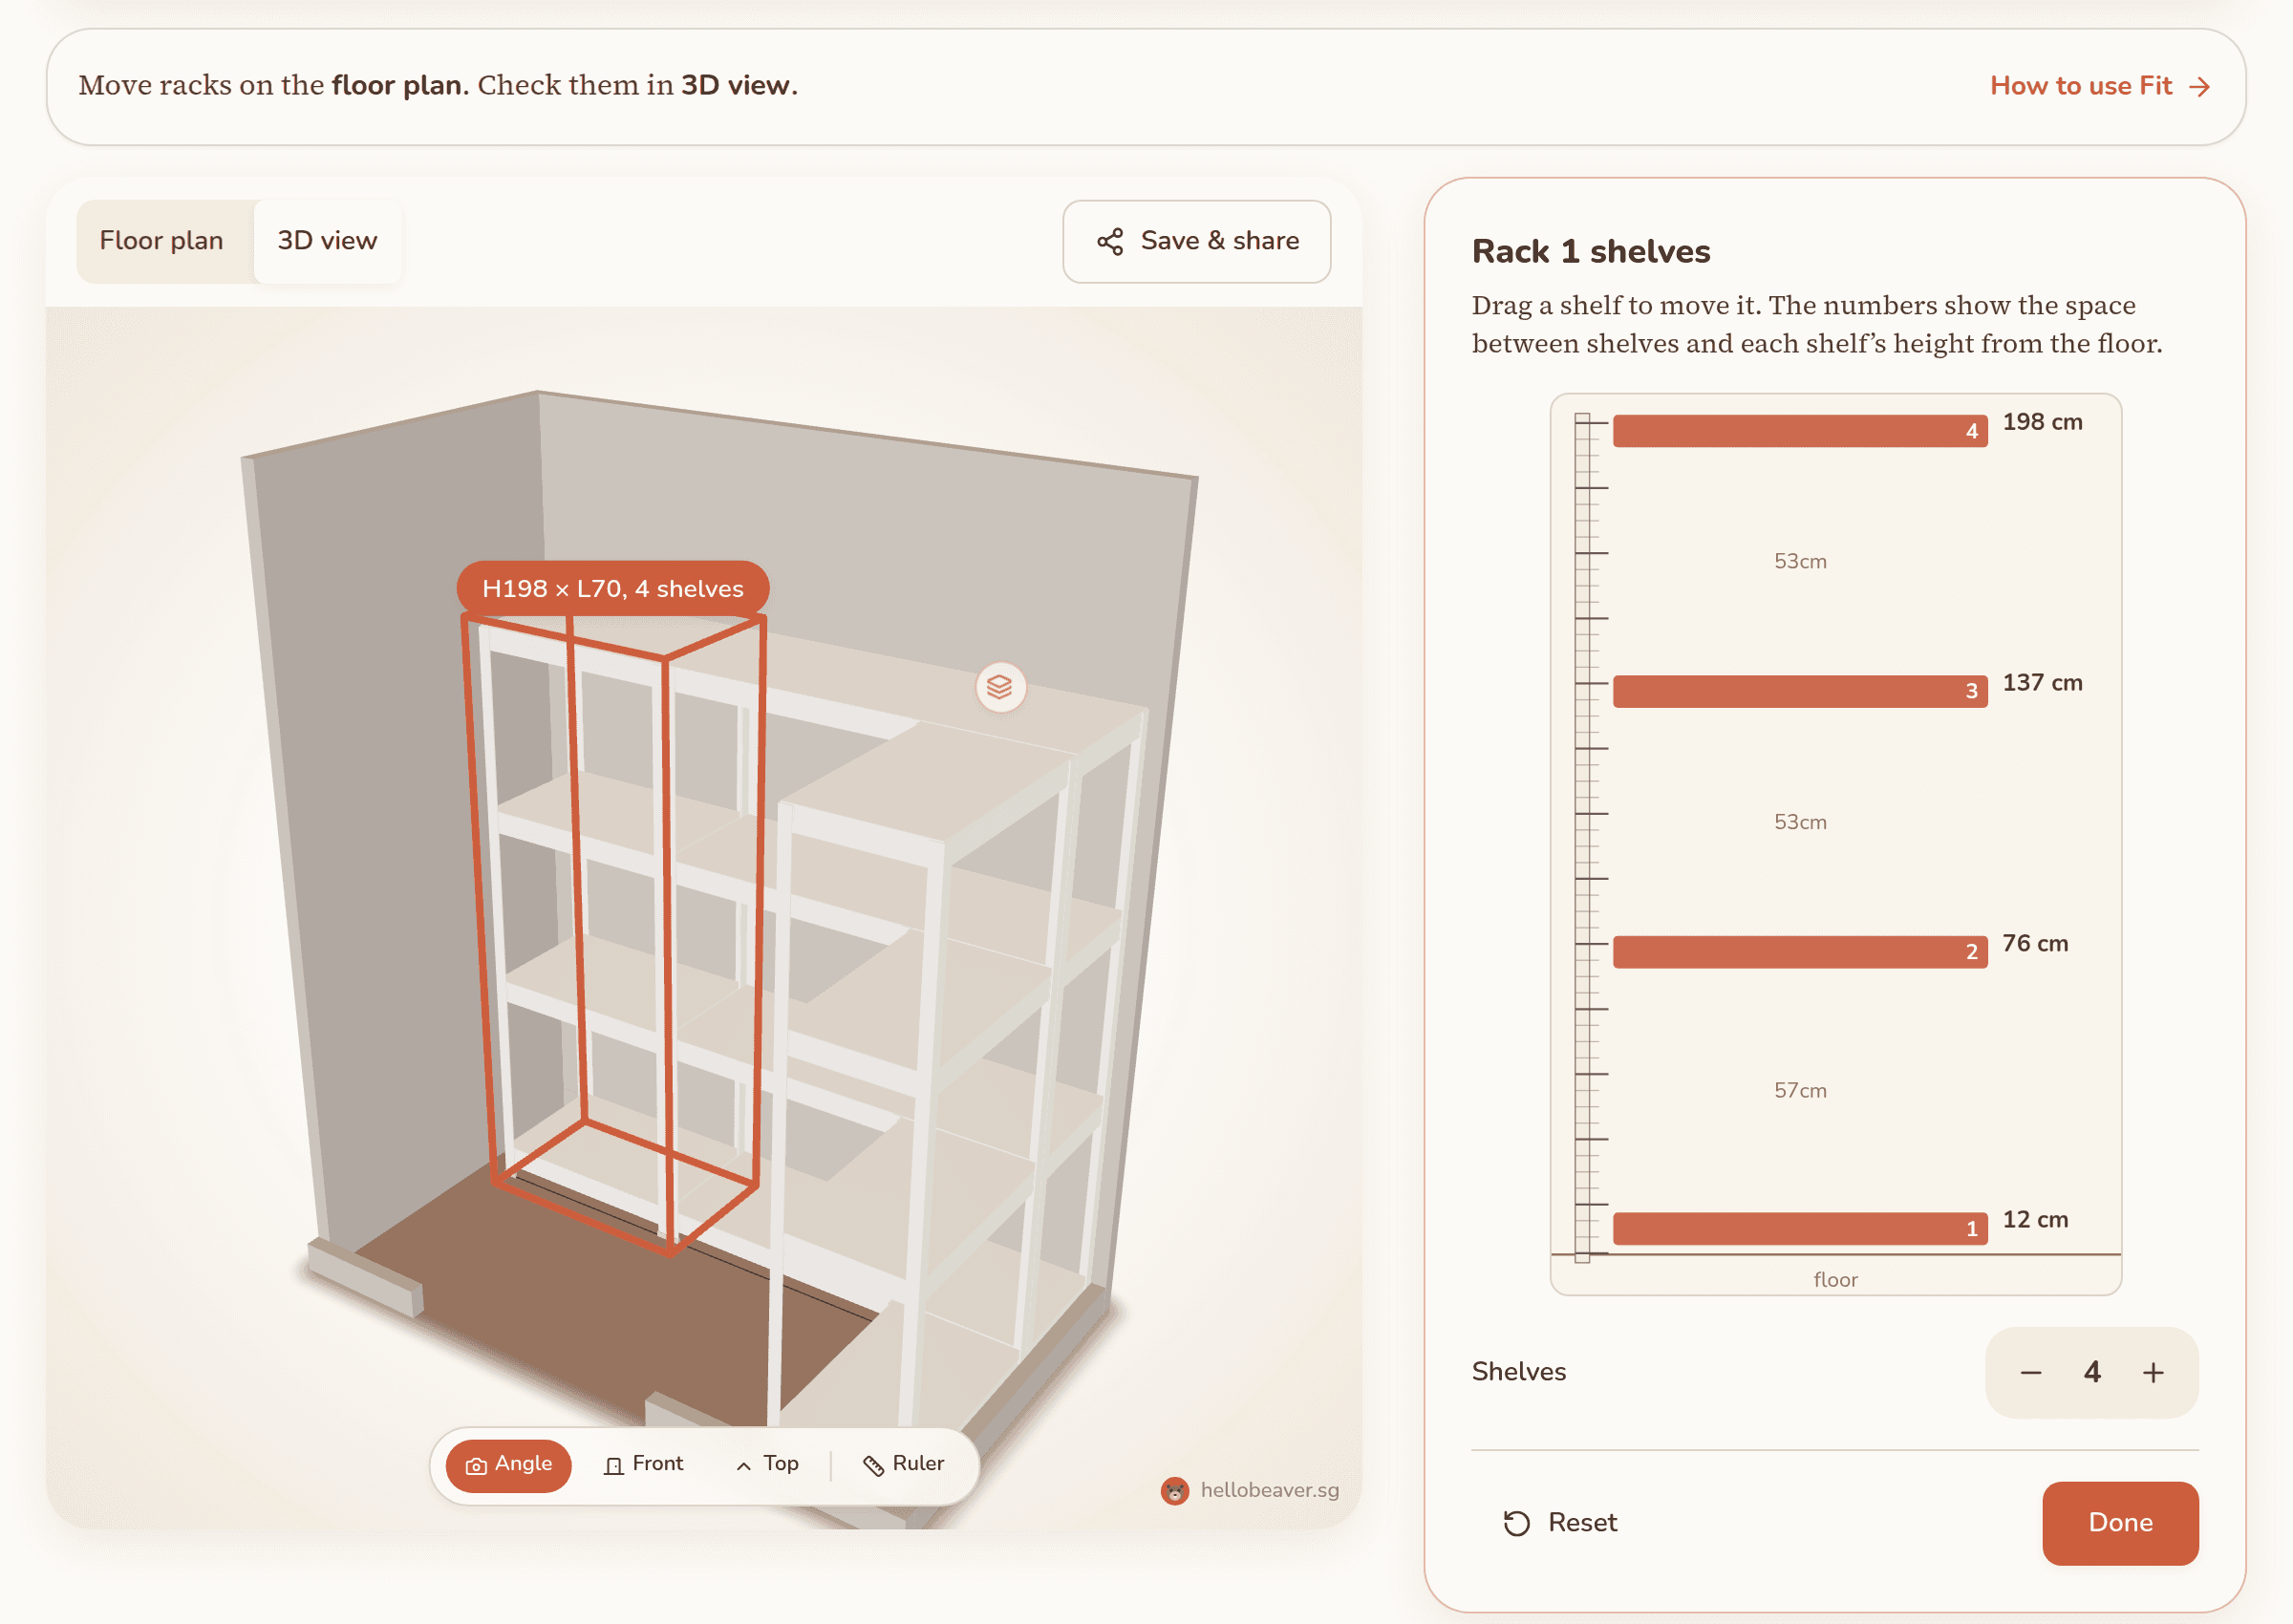
Open a rack and use + and − to add or remove shelves. Customize shelves opens the side view.
In the side view, drag a shelf up or down to make room for tall items like luggage, standing fans, vacuum cleaners and ironing boards. The numbers show the space between shelves, and the 3D view updates as you go.
7.Check gaps with the ruler
Turn on Ruler and hover inside the 3D view. Hover the floor to check walking gaps. Hover a rack to check shelf openings.
If a gap is too tight, go back to the floor plan and move or resize the rack.